Wednesday, April 10, 2013

House Update: Kitchen & Dining Part 2

So after the demo of these rooms, here's what happened next!  Riveting, right? I know you're on the edge of your seat.  Okay, but seriously.

Once the bar frame had been built, we realized it was too high.  Even sitting in bar stools, our arms would have been raised to rest on it.  See?


So we called our contractor and that afternoon his guys came back and lowered it about 4 inches.  They were in and out of the house in 20 minutes flat--no exaggeration.  I was painting there, so I know.  Seriously, this is why you hire experts to do things you have no idea how to do.  That would have taken me ages.  Anyway, moving on.  You can tell it's lower in this pic below based on where the wood hits the wall near the red paint.


It was around this time that our contractor adamantly stated that we needed to drywall our ceiling. I think his actual words were something like "Seriously, I don't want you to tell people that we did your kitchen makeover if your ceiling still looks like that.  That's bad for business." So he gave us a good deal and had some guys come drywall the ceiling the same time they were going to drywall the bar and fridge wall.

Here it is the day after they put up the drywall.  The kitchen tile had also been laid and not grouted yet,
and the countertops had just been installed.  Because the ceiling was being drywalled, the lights had been removed.  Sorry for the lack of light!
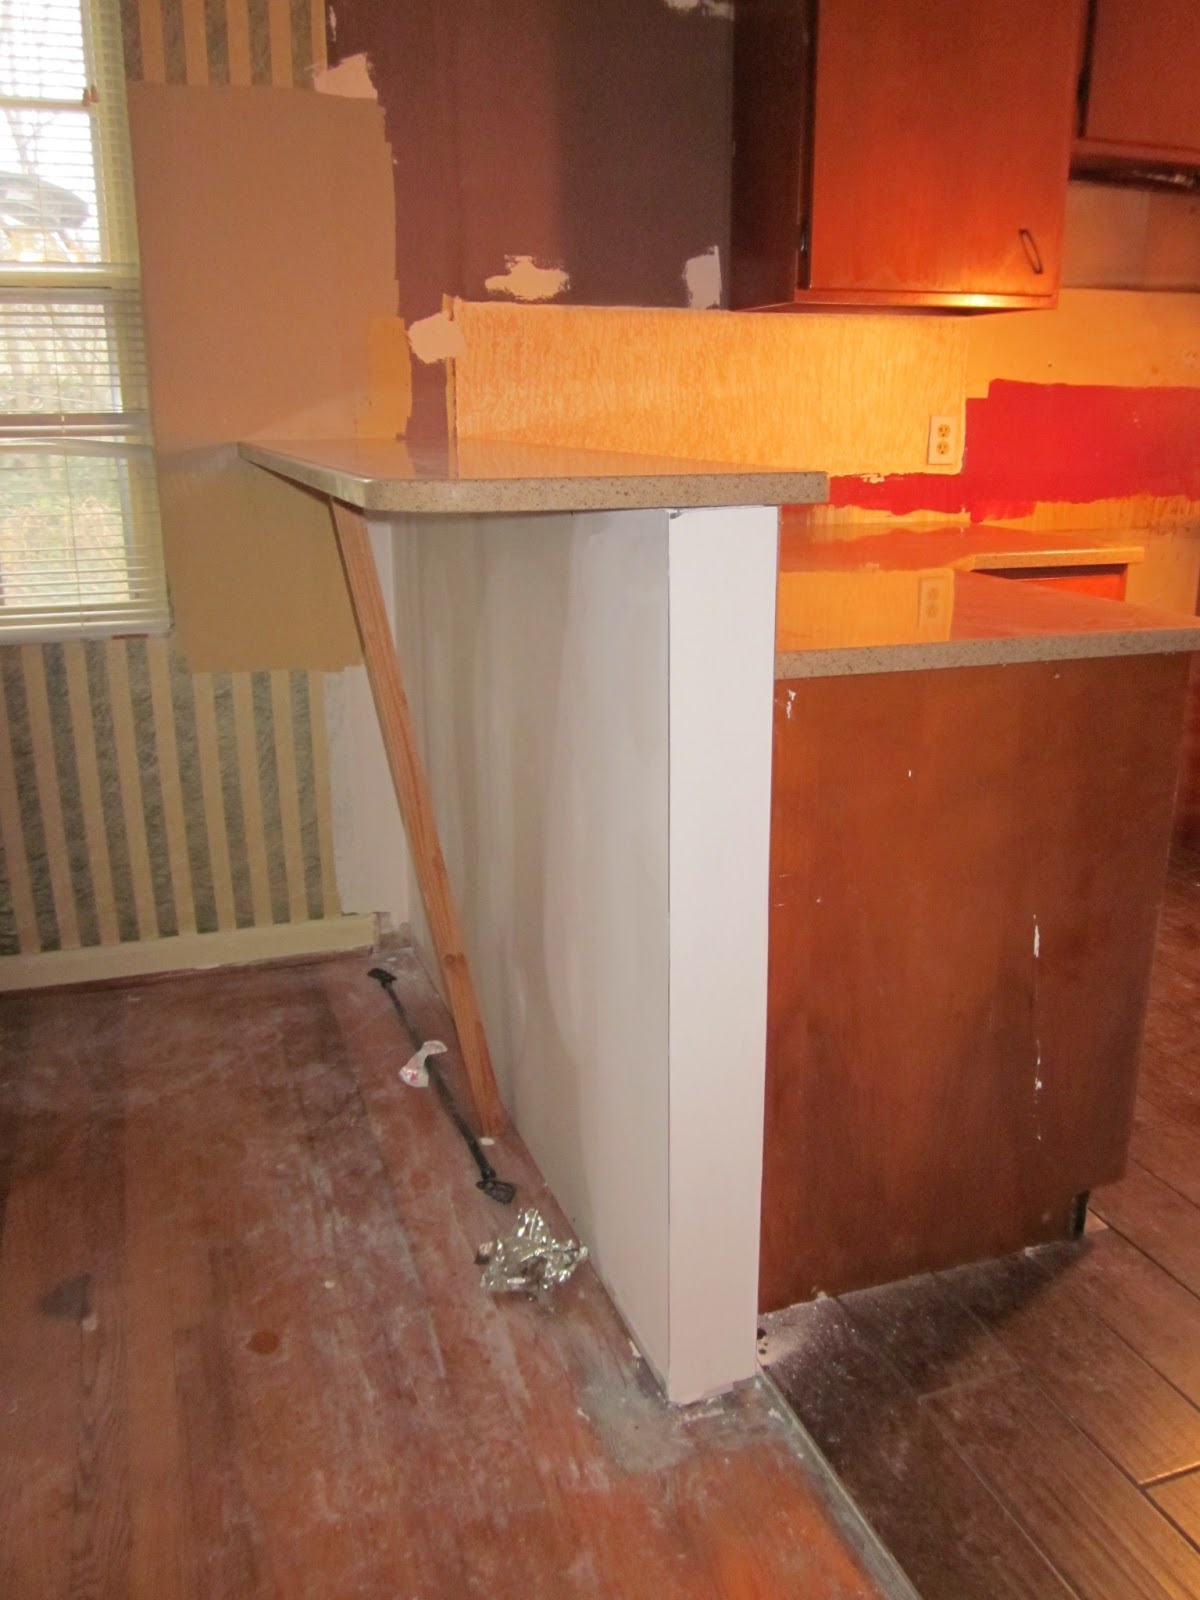

We patched up the major holes and I had two paint options here on the wall, and I was trying to compare them to the counters. It didn't help the lighting was off.


Hurray for beautiful new counters at a third of the price!  And a new sink!  And new tile floor that looks like hardwood!  Things are starting to come together.


We got the counters installed for a third of the price of normal quartz.  Our realtor, a friend of mine, took us to a local store where the owners were literally just trying to get rid of their quartz.  They had received the quartz for free when they bought a shipment of granite from someone else (who was also getting rid of quartz ...apparently the demand is really just for granite these days), so they were still making money by selling the quartz for a third of the normal price.

Sidenote--I originally wanted concrete countertops, and I wanted to make them ourselves to keep the cost down.  We did research and added up what it would cost for us to make concrete countertops, and it came to about $1000 for our kitchen.  Concrete is great because you can put any temperature on it and can pretty much do anything to it without it ever getting hurt.  However, it would have been a big project for newbie DIYers.  

So when our realtor took us to this place to look at quartz and we found out it would only be about $200 different to get someone else to install quartz for us (including a new sink!), we jumped on it.  I think I had about ten minutes to pick out a slab before we put down a deposit because of course, it was available on a first come first serve basis.  Woohoo!  That absolutely was worth the headache it would have taken to order concrete supplies and make them ourselves.  


Okay so look--there's the drywalled ceiling.  We had to paint that after it was all dry, 
which was a new experience for me.  


The lights were off for several days as all these things happened, which made painting after work hours not easy, especially since it was still winter and got dark early.  It also put pressure on me to pick out a new light fixture already!  I knew if we put up the old ones "for now" they would be there for way too darn long.

Enter the new dining light fixture.  I wanted something that wouldn't block the light from the window, because that would affect the kitchen also.  The whole point of taking down that fake bookcase was also for more light and openness.

This particular light is actually from Lowe's in the outdoor section.  


Oh and look!  We painted it "Cup of Cocoa" by Behr.  Hurray for the stripes being gone!
And check out that perfectly drywalled and newly painted white ceiling! Progress!


Drywalling the ceiling made a monster mess of the newly tiled and grouted floors (this is after our tile guy wiped it down three times!), so we tried to clean it up a bit more.


Check out these poor wood floors.


SO much better!


By this point, the new faucet had also been installed.  I got it at a place called Southeastern Salvage here, and it was a steal at $53.  Plus if I ever get attacked while doing the dishes, that sprayer is heavy enough to knock someone out.  :)  


 Whew!  So the ceiling was now done, the painting was done, the floors were done, the sink, faucet, and disposal were now installed, and the lights were installed.

Pics I don't have--the finished painting in the kitchen, and the light installed in the kitchen.  You'll see those in the next post, but I just forgot to take them at this stage in the game.

Next up, MOVING DAY!

A Few House Updates: Kitchen & Dining Demo

I really shouldn't say a few.  It's a lot. It feels like a ton.  Looking back at these pictures, I am amazed by how different it looks.  There are a lot of pictures in this post, I'm warning you.

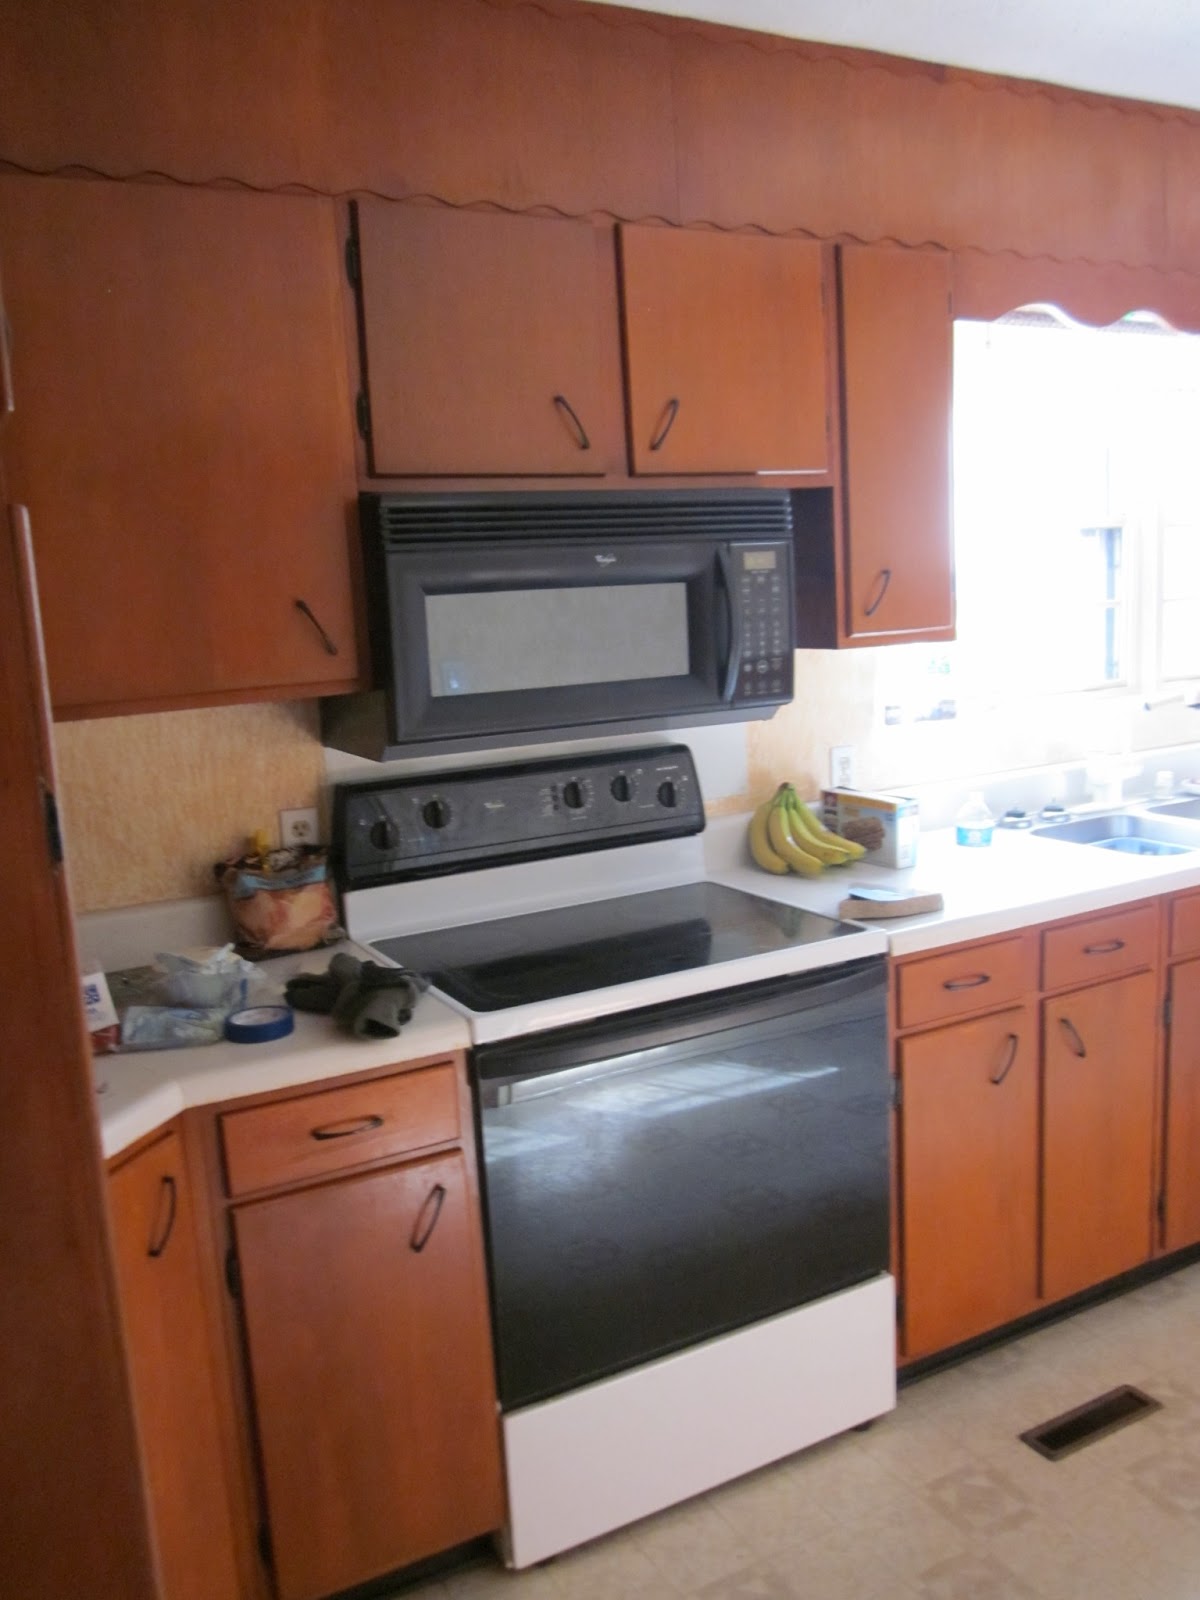
Here's the kitchen before we did anything to it:

Oh look, there's me talking to our realtor.  I know it's hard to see, but like my boots, Leigh? 


Lots of excellent orange wood, fake wood bookshelves in the dining room (why? did they read here?), and laminate.  However, the wood floors are in great shape for being 63! 


Try to take it all in--the angled pulls instead of knobs, the huge fan, outdated everything, layered wall colors, etc.


First thing I did was bring snacks!  I was 14-15 weeks pregnant at this point.  I remember trying to not get sick during our house closing.  Not the most fun thing ever.


You can see a bit of the green-and-yellow-striped-with-gold-sponge-effect dining room through the kitchen.  Here a few more shots of before.


So much potential, but so much work to be done!  I am so glad this part is over.

Here's a little of what the progress looked like.

Demo Day 1--  They seriously did all this by 9 am, when I got there.


This microwave beast is an enormous 36" wide and also very tall.  Oddly, the inside revolving plate is proportionately tiny.  It also left only about 14" of cooking space below it, so I had them rip it out while they were at it.  One of the workers wanted it and took it home with him. He also took the top cabinets they ripped out, which is a win-win for everybody!


Demo's coming along great, but that is a cooking surface you're standing on, dude.


Building a bar top/breakfast area on the left and a small wall to cover the fridge on the right.


Oh look!  A piece of history on this 1950 wall!  Or not.  
I was excited until I saw the tiny circa 1996 near the top.  Sneaky wallpaper.


Well, it has to get worse before it gets better, right? That's what they say at least.  At this point, I'm just hoping it's true...


What even happened here to make these marks on the ceiling?!  Also, not sure if you can see it, but the ceiling is not flat. It's plaster and it's wavy because the weight of it (or something) pulled it down between the beams.  


Do you see how many layers of different color paint and wallpaper there are in this one room?  At least five!  It badly needed to be neutralized and unified in color.


Lots of holes to fill in.


 Phew.  So, that was all in a day's work for this crew!  I have to say, they were efficient.  

More to come on putting these rooms back together!

Tuesday, April 2, 2013

Just One Of Those Days


You know those days when you just feel like you can't do it right?  Do enough?  Be enough?

Today is one of those days.

It wasn't, earlier today.  A good friend helped me paint the nursery this morning and that was so fun and it is always encouraging to be with her.

But then I saw a few things on social media that just made me sad because they were reminders that I can't do it all.  I can't have my entire house finished the way I want it.  I also don't seem to have anything exactly the way I want it yet either, which doesn't help.  And it seems everyone else does.

And you know what I hate about that?  Everyone posts everything they've done right.  No one seems to post their failures.

I don't mean complaints or worries--people post plenty of that.

But they don't post their dirty sinks, full laundry baskets, unfinished painting, mismatched fans, low test scores, stressed out to-do lists, dying relationships, etc.  You get my point.

And I've noticed that whenever people do post about the things that are the "dirty sinks" of their lives, it's often lighthearted as if to say they didn't care, it didn't actually bother them.


Isn't everyone running around thinking that everyone else has it all together?  Everyone pins their favorite pictures on Pinterest, but no one lives Pinterest lives.  In order to look like they do though, they upload altered pictures on Instagram and show how great their lives are on Facebook, and tweet their witty comments.

I don't want to be like that.  I want to live real life in the here and now, not worried or anxious about what other people think about my home, my choices, or my opinions.

I want to be grateful for the blessings I've been given.  Why waste my time wishing I had more of anything--even time, creativity, or motivation?  Wishing does nothing.  I want to make the best use of what I do have, and that means remembering the truth of what is instead of being distracted by what is not.

Saturday, March 2, 2013

Homemade Pizza

Happy Saturday, yall! 

This morning the hubs and I devoured delicious local bacon from Link 41, fried eggs, and a locally made Niedlov's cinnamon roll, with orange juice and coffee. Scrumptious, people.  My husband says this is the best bacon he's ever had, which is definitely a bold statement considering how highly he views bacon.  Turns out keeping things simple and old school is not only better for you, but it tastes much better too.  This bacon has six ingredients--pork belly and five seasonings.  That's it.


If you are ever in Chattanooga, do yourself a favor and go to these two places!  Bonus--they are right next to each other so you will only have to make one stop, and you will feel old school buying separate foods at separate stores.  This is a good thing.  They are experts and know their particular foods like nothin else.

 That's all I have of this morning because we devoured everything as soon as it was ready. 

 ***

But last night I made a delicious homemade pepperoni pizza that I wanted to share.

So pepperoni is one of our favorite pizzas, but the pepperonis you can buy in stores are fairly gross. They have about 50 ingredients, very few of which are self-explanatory.  I love making homemade pizza myself, but have been avoiding pepperonis for the last few months because I didn't know how to resolve that problem.

Then I thought, pepperoni is supposed to be sausage, right?  I looked it up on Cuisinart's food processor guide, and it said that to slice meat, have it mostly frozen, but it can be done!

Naturally, I went to my favorite local pig store Link 41 and bought frozen sausage links to do this.  I talked to one of the workers/owners there and apparently pepperoni is actually a mixture of sausage and beef, but details shmetails. This sausage was going to be delish. 

So this is how yesterday went down.

I took out my dough to relax for about 45 minutes while I began making the pizza sauce. 


Although I've been making my own pizza since we got married almost two years ago, I had yet to make my own pizza sauce.  This stuff was delicious.  And super easy!  I just threw it all in the food processor and it was done in a snap!


Next up, slice the frozen sausages with a cleaned out food processor.  I think if the links were more frozen and hadn't thawed at all, it would have made more clean slices with fewer little bits, but would that have hurt the food processor blade?  I'm not sure.  These are just the little bits left.


Then I cooked the "pepperonis".  I know they're not perfect, but people, perfection is a mark of the processed food industry!  Imperfection just says homemade. 


Degreasing.  I said they were local and without gross ingredients, I didn't say they were fat-free.  It is sausage after all.  :) 


Roll out the dough, top it with your freshly made sauce, add your pepps, and top with cheese.  I add my toppings below the cheese so they don't burn, but if you want them toastier, of course you could do it vice versa.

At 450*, it only takes about 15 minutes.  I don't time it, I just keep an eye on it and when it's nice and toasty, take it out.


YUMMM.  Oh my word, I think this was probably the best pizza we've had.  It tasted more like sausage than typical pepperonis, but they were also thicker than typical pepperonis.  I might try hand slicing next time.


I even went back and got the extra pizza sauce to dunk my crust in it.  I can't wait to eat the leftovers today!  There weren't very many though, no surprise.

I hope your Friday night was just as scrumptious and relaxing! If you want details about how to make this type of pizza, check out Artisan Bread in 5 Minutes A Day: Pizza or their website.  The dough recipe I use is for their bread loaf, so I have yet to master the thin crispy crust.  I definitely want to try that soon, but the original recipe still makes a great crust with barely any work.  Just a few tools, which they go over in their original dough recipe.

Wednesday, February 13, 2013

SO. We have a house!

And it's great!  But boy does it need some work.  And we've done most of that work already, which is good, because we move in ten days!

I don't really know where to begin with the pictures.  So far, I have 112 pics of what it looked like when we bought it, and the progress we've made.  And as we're not fully done in any of the rooms, I can't show any "finalized" before and afters yet.  I'm putting that in quotes because people say you're never finished with your house until you're ready to sell it.  Sigh. 

However, that's life, and updating a 1950 house does not come with a before and after button.  Nope.  It's not a 20 minute HGTV episode either.  It takes hours and hours and days and days and decisions and money and messes and deciding whoever made wallpaper was evil and whoever decided plaster was a good idea wasn't too smart either, and then more money than your contractor said.  And cracks in your fingers because your heat will stop working because you left the heat off and one of the workers turned it on overnight to 85* and it stopped working.  So it'll be 40* in your house and you will wash your paintbrushes in warm water and your finger will crack and it won't heal for a long time.

I digress.

The point is, we knew it was work and we're glad we're doing it, but it was so overwhelming to even begin, because where do you begin with this: ...?


                                                   (the kitchen from the dining room)


                                                      (two-three sponge layered red living room)


                  (green and yellow striped dining room, also with a gold sponge effect.  a few decades old!)


(master bathroom...after I cleaned it)


                                                                  (hallway bathroom)


(hallway connecting the master bath and bedroom)

So that's a peek of what was.  And here's a peek of the progress, 
same angle of looking in the master from the hallway.


Phew!  And that's a lot more work than it looks, as we discovered two layers of wallpaper under the border, and ripping it up made holes in the wall, etc etc.  More on that later! 

For now, goodnight!  :)

Saturday, February 2, 2013

15 Weeks


15 weeks, as of yesterday!  I have my 16 week check up this week.  I have to say, second trimester is much better than the first.  I'm not going to bed at 7 anymore, not wanting to nap all day long, and I'm definitely able to eat more foods.  And cooking onions doesn't make me want to pass out either.


So I know I'm doing the ultrasound pictures (so far) a month behind.  So here are the 12 week pics. And I've tried 174,023 ways to get it to be horizontal and not vertical, but I can't figure it out.  If I ever do, I'll fix it.  But for now, sorry! 


I think it looks like he's chilling in a hammock...vertically that is. :)


And here's the 4D shot.  It was really awesome to see him/her moving all over the place, arms above his head, rolling around...it looked like he was dancing. :) 

At my 16 week check up, they said they were not planning on going to do an ultrasound, but I'm going to ask and see if they can anyway.  Especially if it is a boy, most ultrasound techs can tell which gender it is by 16 weeks.  And the sooner I know, the better!

If I do get an ultrasound and more baby pics this week, I'll post them.  If not, these are it until 20 weeks! 
Other than baby bump pictures, that is.

--------------------------

I have about a million house pictures to show yall--we closed about a week and a half ago and in the past week, have painted several rooms and trim, and have had an old built in bookshelf between the dining and kitchen ripped down and replaced with a bar. We spent hours ripping down wallpaper and border off of plaster walls--there could be no worse combo than plaster and wallpaper. Ugh! But it's done.
Oh and the floor guys began tiling too, one bathroom down so far I think. 

By the end of this week, the kitchen and bathroom tiling will be done, carpet will be put down in the bedroom, the kitchen countertops will be installed, and surely more painting will be done. Lots of changes!!

And lots of pictures to show.  But for now, I'm exhausted.  Pics to come once I weed through them all!